15 February 2021
How to Uninstall Firefox on Mac
Firefox offers a fast, safe web browsing experience on macOS. You can browse quickly, securely, and effortlessly.
There are so many browsers out there, that trying more than one is a good idea as you can then figure out which one will best meet your needs. Some websites also require a certain browser for them to work correctly, which may mean you have one on your computer just for that purpose.
Browsers can take up a lot of space on our computer once they start to cache data. If you’re not using one, deleting it off of your computer will help free up space for other files that you want to save.
Note that Mozilla does not make a Firefox removal tool that would allow you to complete a clean uninstall of the app. To completely uninstall the app, there are 2 parts that have to be done.
Part 1: How to Uninstall the Firefox Application on Mac
Uninstalling Firefox by Dragging It to the Trash
The easiest way to uninstall Firefox is to drag it to your trash. This only requires a couple of steps:
Step 1. Quit Firefox and make sure that it is no longer running or else we won’t be able to delete it from our computer.
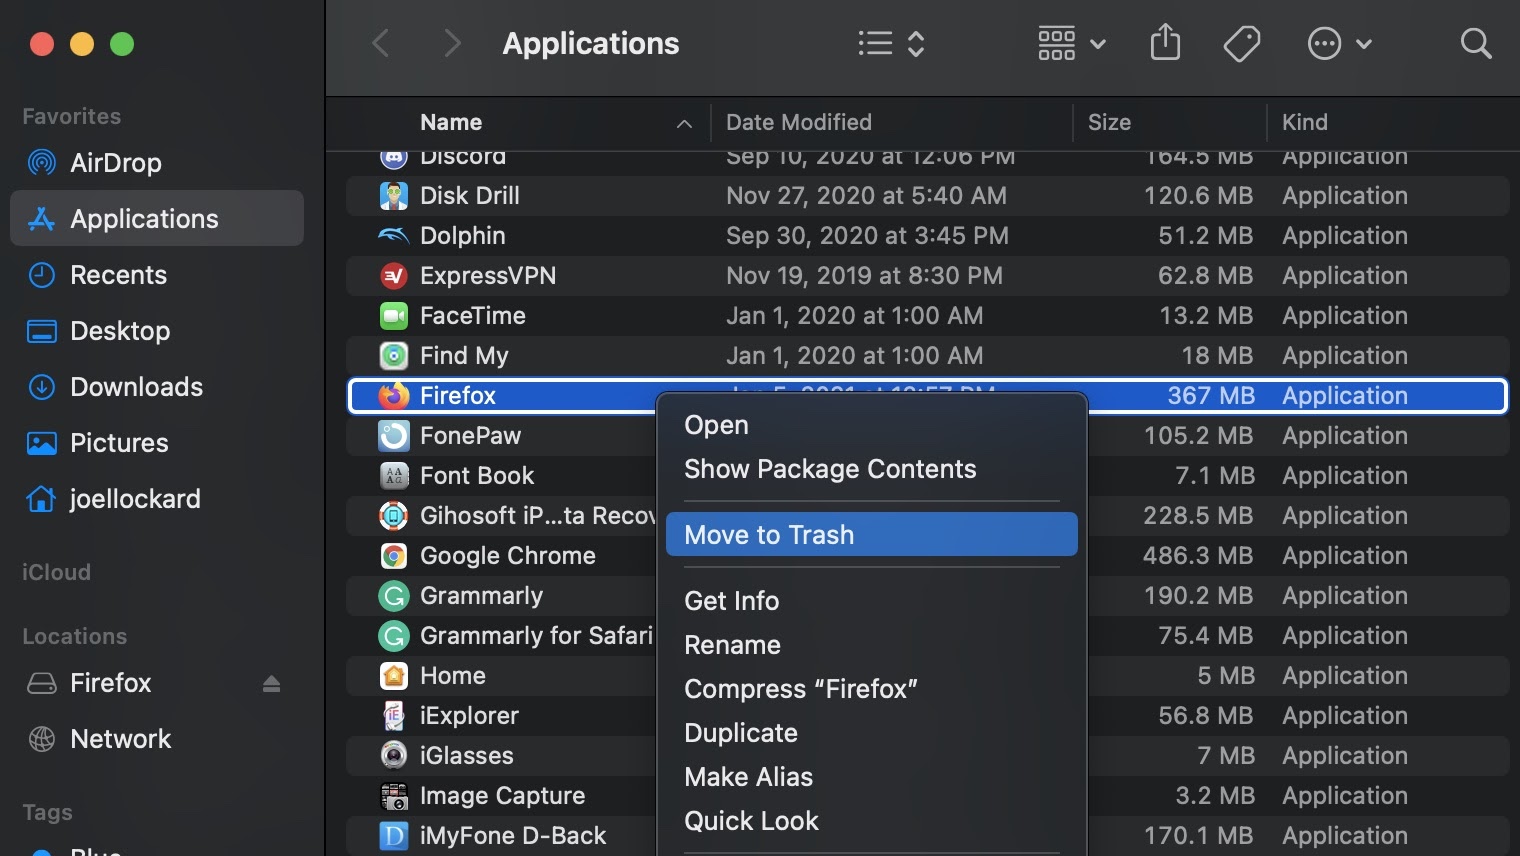
Step 2. Launch Finder and navigate to your Applications folder.
Step 3. Right-click on Firefox and choose Move to Trash.

Step 4. Open the trash can and choose Empty Trash which will then remove Firefox freeing up space on your Mac.
How to Remove Firefox Using the Terminal
If Firefox won’t uninstall using the above method, then using the Terminal is another alternative worth looking into.
The Terminal is different from other apps as it is text based and doesn't have a graphical interface where you use a mouse, everything that you do you have to type to accomplish it which some users may not be used to.
We can use the Terminal to uninstall Firefox and this only takes a few lines of code to do so.
Note: The Terminal is a powerful tool and not typing things correctly into it can cause the incorrect file to be removed from your Mac. The Terminal does what you tell it to do and won’t ask you to confirm your command. Once you hit enter, it will remove whatever you had typed into the Terminal window and will not put it into the trash first, it is gone forever. It is best to make sure you have typed everything correctly to avoid deleting the wrong application.
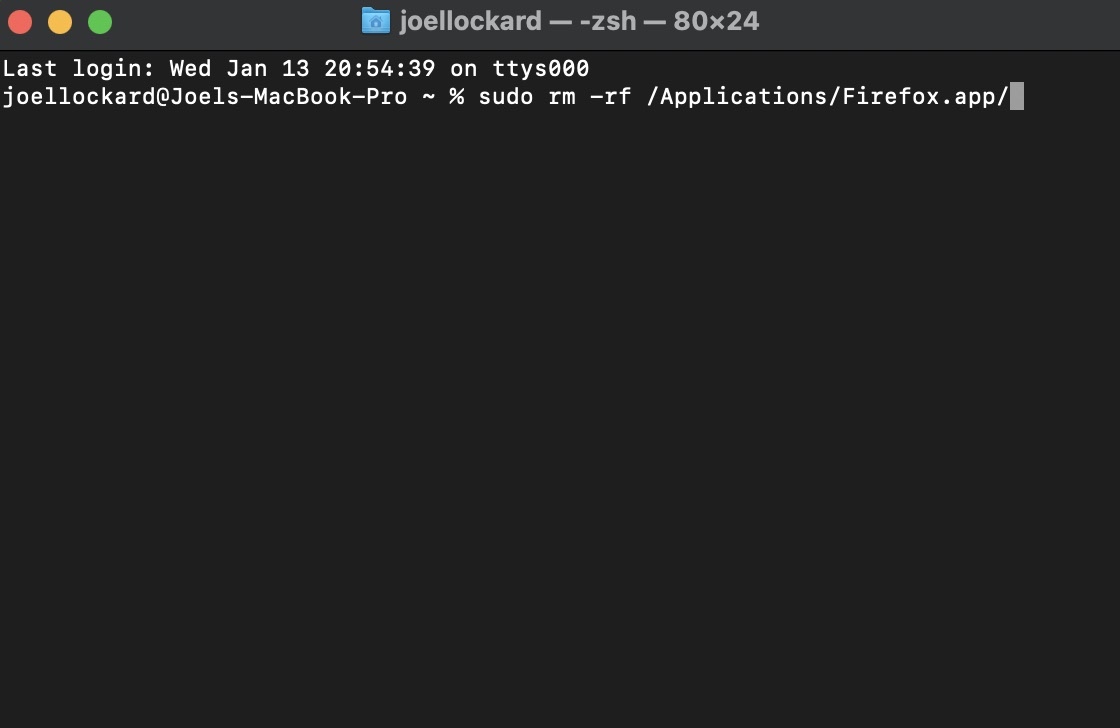
Step 1. Launch the Terminal.
Step 2. Type in “sudo rm -rf /Applications/Firefox.app/” (without the quotations).

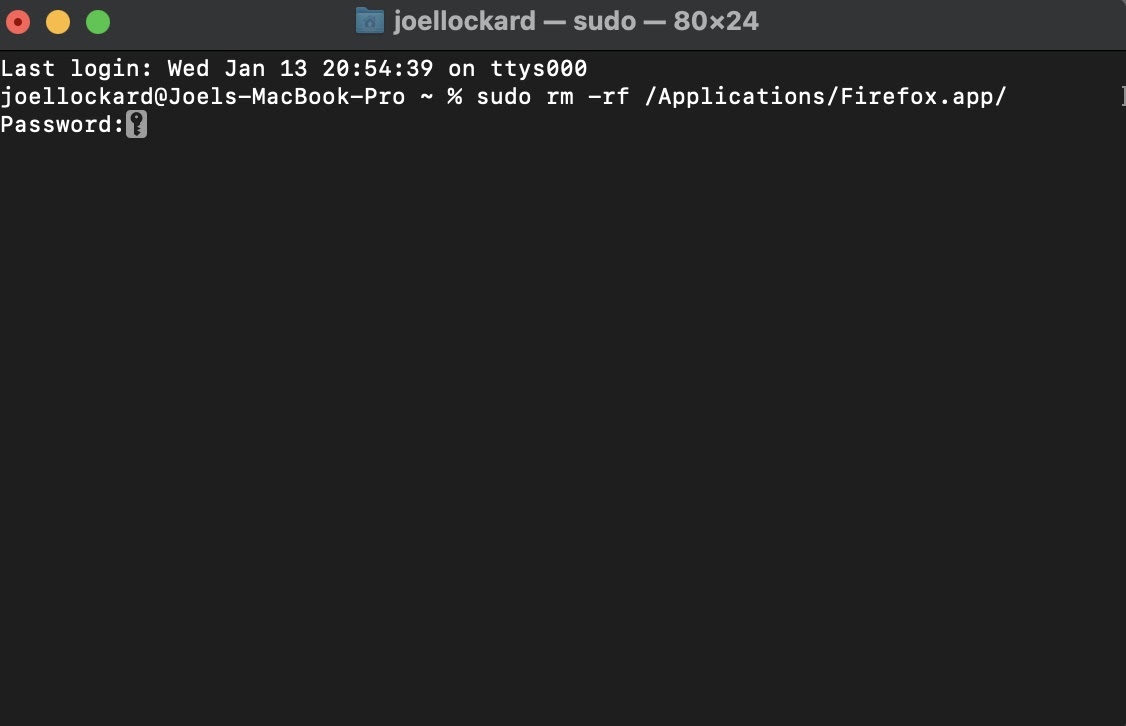
Step 3. You will then need to put in your administrator password. This would be the password that you use to unlock your Mac or make changes to it. When you type in your password, it won’t show up within the Terminal window either.

Step 4. After you have typed in your administrator password, double-check that you typed in the correct app name and hit the Return key on your keyboard. Firefox will now be removed and you can note that there is no confirmation message letting you know.
To confirm that the application has been removed, go to your Applications folder and see if the app is still there. If you don’t see it listed anymore, then the uninstall was a success. If you’re still seeing it listed, double-check that you typed everything correctly and try again.
Part 2: How to Delete Associated Firefox Files
While the above method will uninstall the Firefox app, there are files left behind that will also need to be removed.
Step 1. Launch Finder.
Step 2. Highlight "Go" in the nav bar and then scroll down to "Go to Folder...".
Step 3. Type in ~/Library as the destination and then click on Go.

Step 4. Find the Firefox folder and then choose Move to Trash to remove all associated Firefox files.

Step 5. This will remove all associated files with Firefox and any Firefox plugins.
Conclusion
With there being so many apps out there these days, it’s important to know how to remove them when we’re done with them to free up space on our Mac and keep it running fast.
Knowing how to remove associated files with an app also ensures that nothing is left behind sitting on our computer when we may have thought that we got everything.
After uninstalling Mozilla Firefox, you may want to try an alternative such as Chrome or Safari which can help you change up your web browser game and try something new.
The steps above were completed on my MacBook Pro, but the steps above will be the same on any Mac machine that you may have.


