12 July 2022
How to Access and Control Your Mac Remotely from Any Device
Being away from work does not need to stop you from working. Now may be the time to learn how to remote access Mac files and applications from home.
First, you just need to enable a few settings on your Mac that will open up your device to connections using well-established VNC and SSH protocols. It sounds complex, but macOS makes it clear and easy.
From this article you will learn:
-
How to allow remote access to your Mac
-
How to control your Mac from another Mac
-
How to access your Mac from an iPhone/iPad
-
How to remote access your Mac from a Windows PC
-
5 best remote access apps for macOS
In each section we will detail how you can control your Mac as if you were sitting right in front of it, as well as some simple ways to connect with your files. By the end, you should be able to find at least two good solutions to remote control Mac computers.
How to allow a remote computer to access your Mac
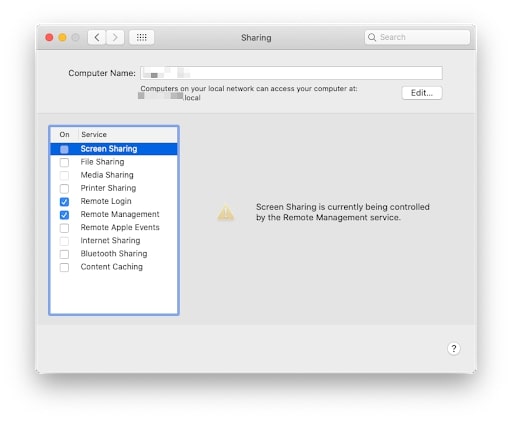
All of the necessary settings to allow you Mac to be available remotely are found in the System Preferences > Sharing section.
We will be utilizing three of the available Sharing options in this article: Screen Sharing, File Sharing, and Remote Login. Once you have mastered these, you can move on to reviewing the additional Media, Printer, and Bluetooth sharing tools to discover how they might improve your home network.
To access the Sharing options on macOS:
Click on the Apple on the menu bar and select System Preferences.

Go to the “Sharing” section.

Here you can set the level of remote access allowed to you Mac here in the Sharing section.
Screen Sharing
Screen sharing allows for a VNC connection that will mirror what your Mac screen is showing. This can even allow for a remote user to control your mouse. You also have the option to require a password before allowing any remote control.

File Sharing
The File Sharing options allow you to access your Mac’s file directory. Here in these settings you can set which directories are available and which users have access. You will be asked to enter your user password when turning this on and the same password will be requested when connecting remotely.

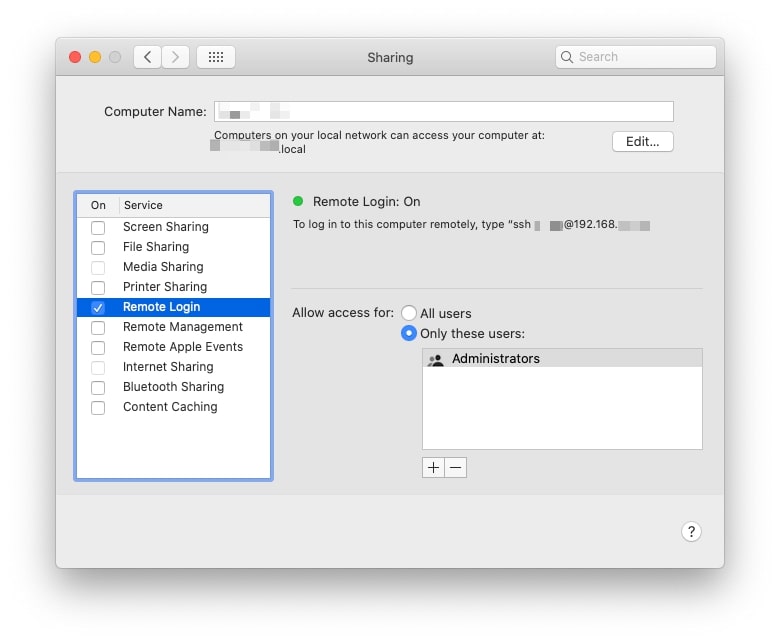
Remote Login
Remote Login allows access to connect to your Mac using the SSH (Secure Shell) network protocol to connect to your machine privately via a public network (i.e. the Internet). This protocol is how most file and system sharing programs are designed to work.
After enabling remote access, you will be able to pick from several options for accessing your Mac from other devices. The options range from using default (free) features available on all Macs to even more features using the most reliable and consistent apps available.
How to remote control Mac from another Mac
With Screen Sharing enabled (see the section above) you can quickly control a Mac from any other Mac on your local network using the Finder app.
1. Open a Finder window, and from the menu bar select “Go” and choose “Network”.

2. If you are on the same network as your Mac, you will see it listed in the Network view.
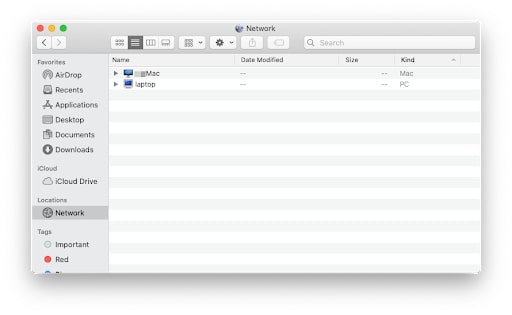
3. Clicking on any MacBook listed here will attempt a remote connection. It will ask for your user name and password.
Keep in mind, this will be the same username and password you use to login into your Mac at start-up. Once your credentials are entered, the Screen Sharing utility will open and you will see the desktop view of your remote Mac.
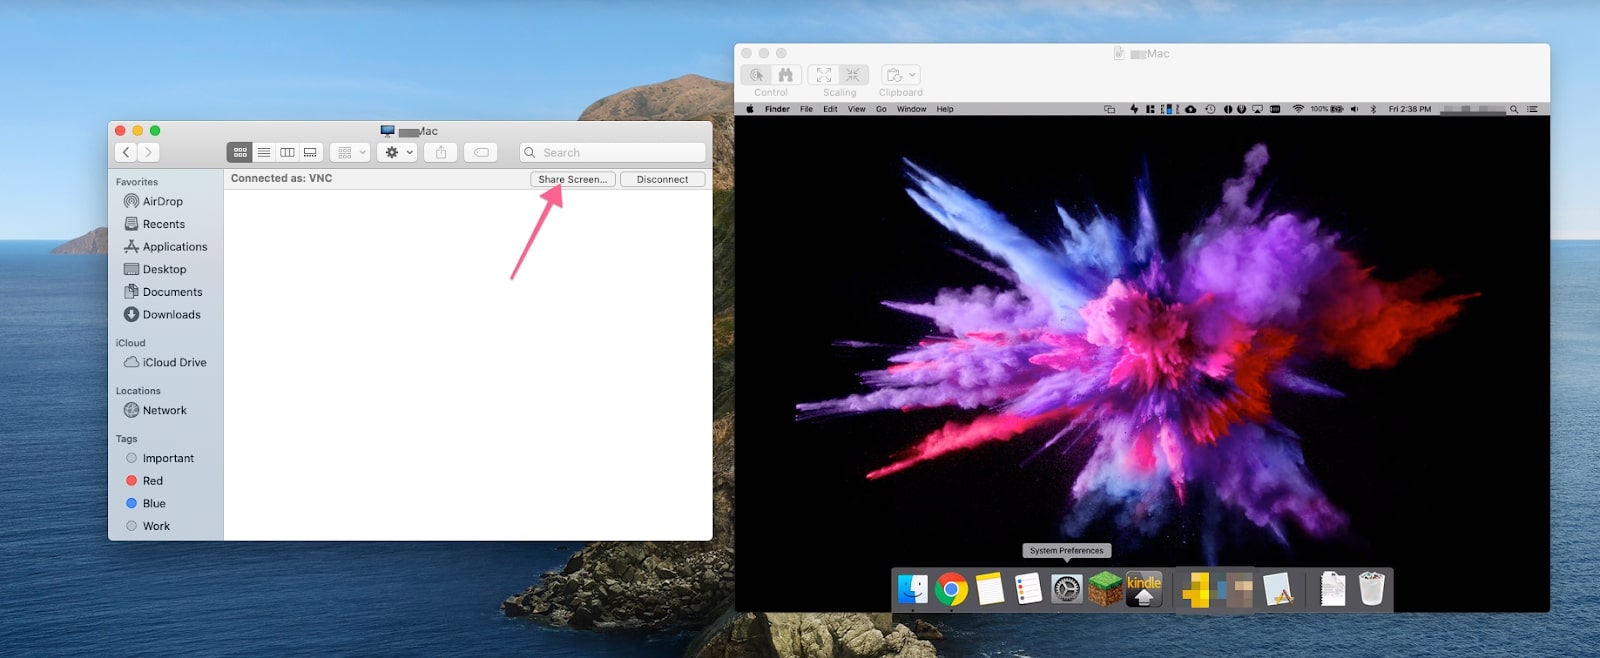
In all of the examples so far, both Macs have been on the same local network. This can all be done from a remote network if the proper routing has been configured. Typically, connecting to a workplace via a VPN from home will put you in that network and then allow you to use these free Mac features with no interruptions.
However, some VPNs may not be configured properly, but the remote desktop software listed below can provide the workaround needed if this is your case.
How to remote access mac from iPhone/iPad
iPhones and iPads are very convenient for quick and easy access to any computing task, but they are built on a different system.
Since Apple has yet to offer a seamless connection point between macOS and iOS for remote access, this remote control will require a secondary app.
Of all the iPad or iPhone apps that facilitate remote access, the Remote Chrome Desktop app is the only completely free option.
All you need to have is a Google account, a Chrome browser, and free apps downloaded and installed onto your Mac and iOS device.
From the Mac you want to control remotely
1. On the remote computer, open Chrome, log in to your Google Account and go to remotedesktop.google.com/access.
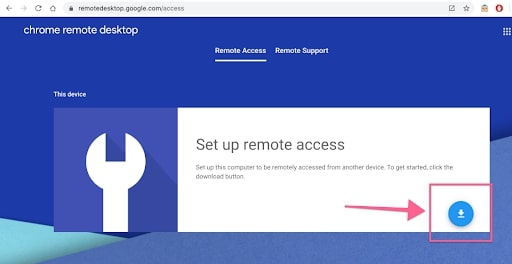
2. Click on the install option under the “Remote Access” section. This will prompt you to add the Remote Chrome Extension from the Chrome web store.

3. Once the extension is installed, return to remotedesktop.google.com and you can start the remote access by entering a name for your Mac (keep in mind that you may create more than one remote connection).

4. You will be asked to enter a 6-digit pin to use when attempting to connect remotely. Enter that number, make a note of it, and select “Start”.

5. Leave your computer running with Chrome open. You can use this app to keep your remote Mac from going to sleep.
From the iPhone or iPad
1. Head to the App Store and download the Chrome Remote Desktop app.
2. Once installed, open the app and login with your Google account.
3. Once logged in, any active Chrome Remote Desktop instances that are available will appear in the app.

4. Click on the device you want to connect to, enter the pin, and your desktop will appear.

There are options available in a menu on the bottom right of the desktop view. These features include an option to close the connection and some that can adjust the settings for how your taps on the iPad or iPhone screen will be recognized by the remote Mac.
Although this article only shows how Chrome Remote Desktop will connect you from your iPad or iPhone to your Mac, it also works for Mac to Mac, and Windows to Mac connections.
4. How to remote access Mac from Windows PC
The divide between Mac and PC is a thing of the past. The VNC and SSH protocols allow one to control the other.
For example, Chrome Remote Desktop uses VNC so it can allow a Windows computer to control a Mac via a Chrome browser.
Another great tool that has been around for a long time is VNC Connect. For less than $4 per month you can have easy access to your devices from iOS, Windows, or Mac. The free trial is currently 30 days.
On your Mac that you want to control remotely
1. Download and Install VNC Connect
2. Sign-up for a RealVNC account for access to their servers, and also to make it easier to find your remote devices in the VNC Viewer apps.
3. Start the VNC Connect app and leave it running to allow remote access.

On the Windows PC
1. Download and Install VNC Viewer for Windows.

2. Once installed, open the VNC Viewer.

3. Enter the Mac’s VNC IP address (found in the Screen Sharing options on the remote Mac, see the section above) and you will be prompted to enter your Mac login credentials.

4. If you sign-in using your RealVNC account then your devices will display for you, making it easy to choose and connect among multiple desktops.

5. Simply click on your device and you can have control of your desktop.

Windows File Explorer to Access Mac Files
If you only need to manage files on your Mac and not control the entire desktop, then your Windows computer already has what it needs to connect.
When File Sharing is enabled on your remote Mac, you can connect from the Windows File Explorer fairly easily.
From the address bar in the File Explorer, enter two backslashes followed by your Mac’s SSH ip address, for example \\192.168.x.x, with the ‘x.x’ is a set of digits specific to the network.
As long as your Windows PC is accessing the same network as your Mac, you can now drag and drop any files to and from your Mac’s file system.

5. The Best Remote Access Apps for macOS
The first five apps listed here can all facilitate a remote desktop connection between a Mac and a Windows PC and iPhone/iPad. The last one is the key to keeping your remote Mac available indefinitely. All of these apps are used and reviewed by MacUpdate members.
VNC Connect and VNC Viewer
The Connect app is installed at the remote Mac and left running while you are away. The Viewer app is the remote desktop client you install on your other device, and there are options for both Windows PCs and iPhones/iPads. It is reliable and, for all that it does, is not unreasonably priced.
Chrome Remote Desktop
The key selling point for using Chrome Remote Desktop is that it is easily available for anyone that has a Google account, and is as ubiquitous as the Chrome browser. This is the best of the free options as it is the only one that allows for access from any kind of device. Of course, being free means it is lacking in some more advanced features like file sharing.
Screens
One of the best looking and easiest to use remote connection apps for Mac is Screens. The one-time cost makes it an attractive option, though the reviews can be inconsistent. Like the others in this list, it has apps available for connecting from Windows and iOS devices (the iPad app is an additional cost).
AnyDesk
For a more robust set of features you can turn to AnyDesk. The heftier price tag comes with the ability to connect with any number of devices (including servers) with little configuring required. MacUpdate users attest to how well it works when connecting to iOS devices.
Jump Desktop
Jump Desktop is a low-cost option for remote connections among Mac, Windows, and iOS devices. It touts its compatibility with not only VNC but RDP (Remote Desktop Protocol) developed by Microsoft which gives it broader access to Windows systems from your Mac. It is recommended as a reliable back-up option for remote access.
Extra: Amphetamine
This app is not for establishing a remote connection, but this app can solve the most common problem that interrupts most remote connections. Amphetamine is a menu bar app that will keep your Mac from ever going to sleep. However you decide to connect remotely, this app can keep your Mac system running so you can be gone for weeks and still re-connect.
The Bottom Line
Remote access requires directing your internet through a server to connect from where you are to where your Mac is. If you are not in the same place as your Mac then you will need a VPN connection to your office network or use one of the apps listed above. In any case, the reliable network protocols VNC and SSH used to facilitate screen and file sharing on Mac are going to keep your connection private, protected, and always available.
Software Expert


